Saturday, October 30, 2021

Fiberglass Sheathing

I spent 3 hours tonight covering the bottom 3 planks of the build with fiberglass. I had some 4 oz. glass on hand, so I used it. I would rather have used 6 oz. but the budget being what it is... I went with what I had.

After I sanded the edges of the tape, I used a foam roller to coat the ply with epoxy. Not sure this is the best procedure. I probably should have laid out the glass, poured the epoxy over it and used the rubber spatula to wet it out. As it was, the glass is hard to smooth out. It turned out ok I think, but it took a lot of coaxing. 


While it's "green", I will coat it with a couple coats of epoxy and be done with it 'til paint time.


Friday, October 29, 2021

Taped the Bottom

With my foot feeling good, I decided to tape the bottom of the boat. I started by planing the other garboard, routing the trunk slot and doing final prep of the 3 bottom planks.

Then I taped the two joints and put some tape on the cut around the slot that I made when I fixed the trunk. Here's what I wound up with.


When this cures, I'll sand it a little bit, especially the one edge of the tape that is so thick, and then put my cloth over then entire bottom three planks.


Thursday, October 28, 2021

Foot in a Boot!

That's boot -  not boat! 

For a year my left heel has been hurting. It started after the softball game at last year's pastor appreciation picnic. That was October 2020. I got an xray and the doctor told me it was a bone spur and inflammation of the Achilles tendon. She referred me to a sport's medicine specialist.

I went Wednesday hoping he would give me a shot, fix me up and I'd be back to normal. Nope. Don't do shots in the Achilles. Might rupture! I sure don't need that. 

The solution? Wear a boot for 6 weeks.  


Well, I wore it out of the office and for the rest of the day until church time. This obviously would put my boat building in a crimp. The more I thought about it, the more I figured I just as well wait until after Christmas to wear that boot. Get my hull done, holiday over and then during the heart of winter build my sail.

Today my foot felt really good, probably the best it has felt for a year. Maybe just a day's rest helped? 

At this point, I'm going to take it a day at a time. Maybe wear the boot some, Maybe not. I'd sure like to get that hull turned by New Year's Day.


Monday, October 25, 2021

Trunk Fix

I just couldn't bear the thought of that daggerboard trunk being off verticle as much as 1/2". Too much! If it was going to be corrected, now was the time, before I went any further with the planking. So I tackled it tonight.

I've been thinking about it for a couple days. I come up with a plan. I started by borrowing a friend's oscillating saw. I've never used one, but I knew it was the tool I needed. 

With this saw I was able to cut the daggerboard free from the midship frame.


Then I cut through the keel plank on three sides of the daggerboard. I figured, if I did that, I could flex it enough to get it verticle/plumb.


I used a ratchet strap to flex it to verticle. And I was careful to get it straight this time (or as near as possible). If it's off this time... sorry Charlie.


Then I filled in the cuts with epoxy. I did leave one side of the joint with the midship frame open so that I can fill it completely when the boat is turned right side up. I'll also add some epoxy to the long joint as well. 


I'll do some sanding after all is said and done. I'm thinking no one will ever know unless you or I tell them. 


Saturday, October 23, 2021

Temporary Work Table

Trying to cut these planks out on the driveway is way too hard! These cuts need to be precise, smooth cuts and that's not possible on the ground. I decided to cut my pallet in half and make a temporary work table. Today I cut out my first plank #2. It was sooooo much better cutting on that table. The plank turned out nice. 

Here's the table.


Here's some work on plank #2. First is the temporary joint in the two pieces of my spiling batten. It's just held together with a small amount of hot glue. I can't afford to let that bond break so while working with it, I clamped it tight. I did take the clamps off when I was transferring the points to my plywood.


Plank #2 getting marked. 


I used the Rotozip for the cut. It worked well. I did break a bit halfway through the second side of the plank, but they are not too expensive. The set I bought has several in it. 

The plank is currently lying loosely on the molds. It looks like a very good fit.  First of the week I'll glue it up and then it's on the plank #2 on the other side of the boat. 


Wednesday, October 20, 2021

The Verdict is In!

I have spent the last 2 work sessions working on a dummy plank to see how accurate my second effort at spiling was. When I say 2 sessions, I mean 4 hours! This is slow work!!

After making a new spiling batten out of the $10 piece of damaged underlayment I bought, I took the rest of the sheet, ripped it down the middle, epoxied it end to end (hot glue didn't work - my glue gun won't put out enough glue at one time) and transferred new dimensions to it. I cut it out and laid it on the molds. It looks pretty close. I believe it's going to work. 


It may be off a little, but not enough to worry with. My biggest issue was cutting it out. Since I'm only going to do one plank at the time, I may try that Rotozip again. Once I get the hang of this, the planking should move a little faster. 


Wednesday, October 13, 2021

Spiling Anxiety

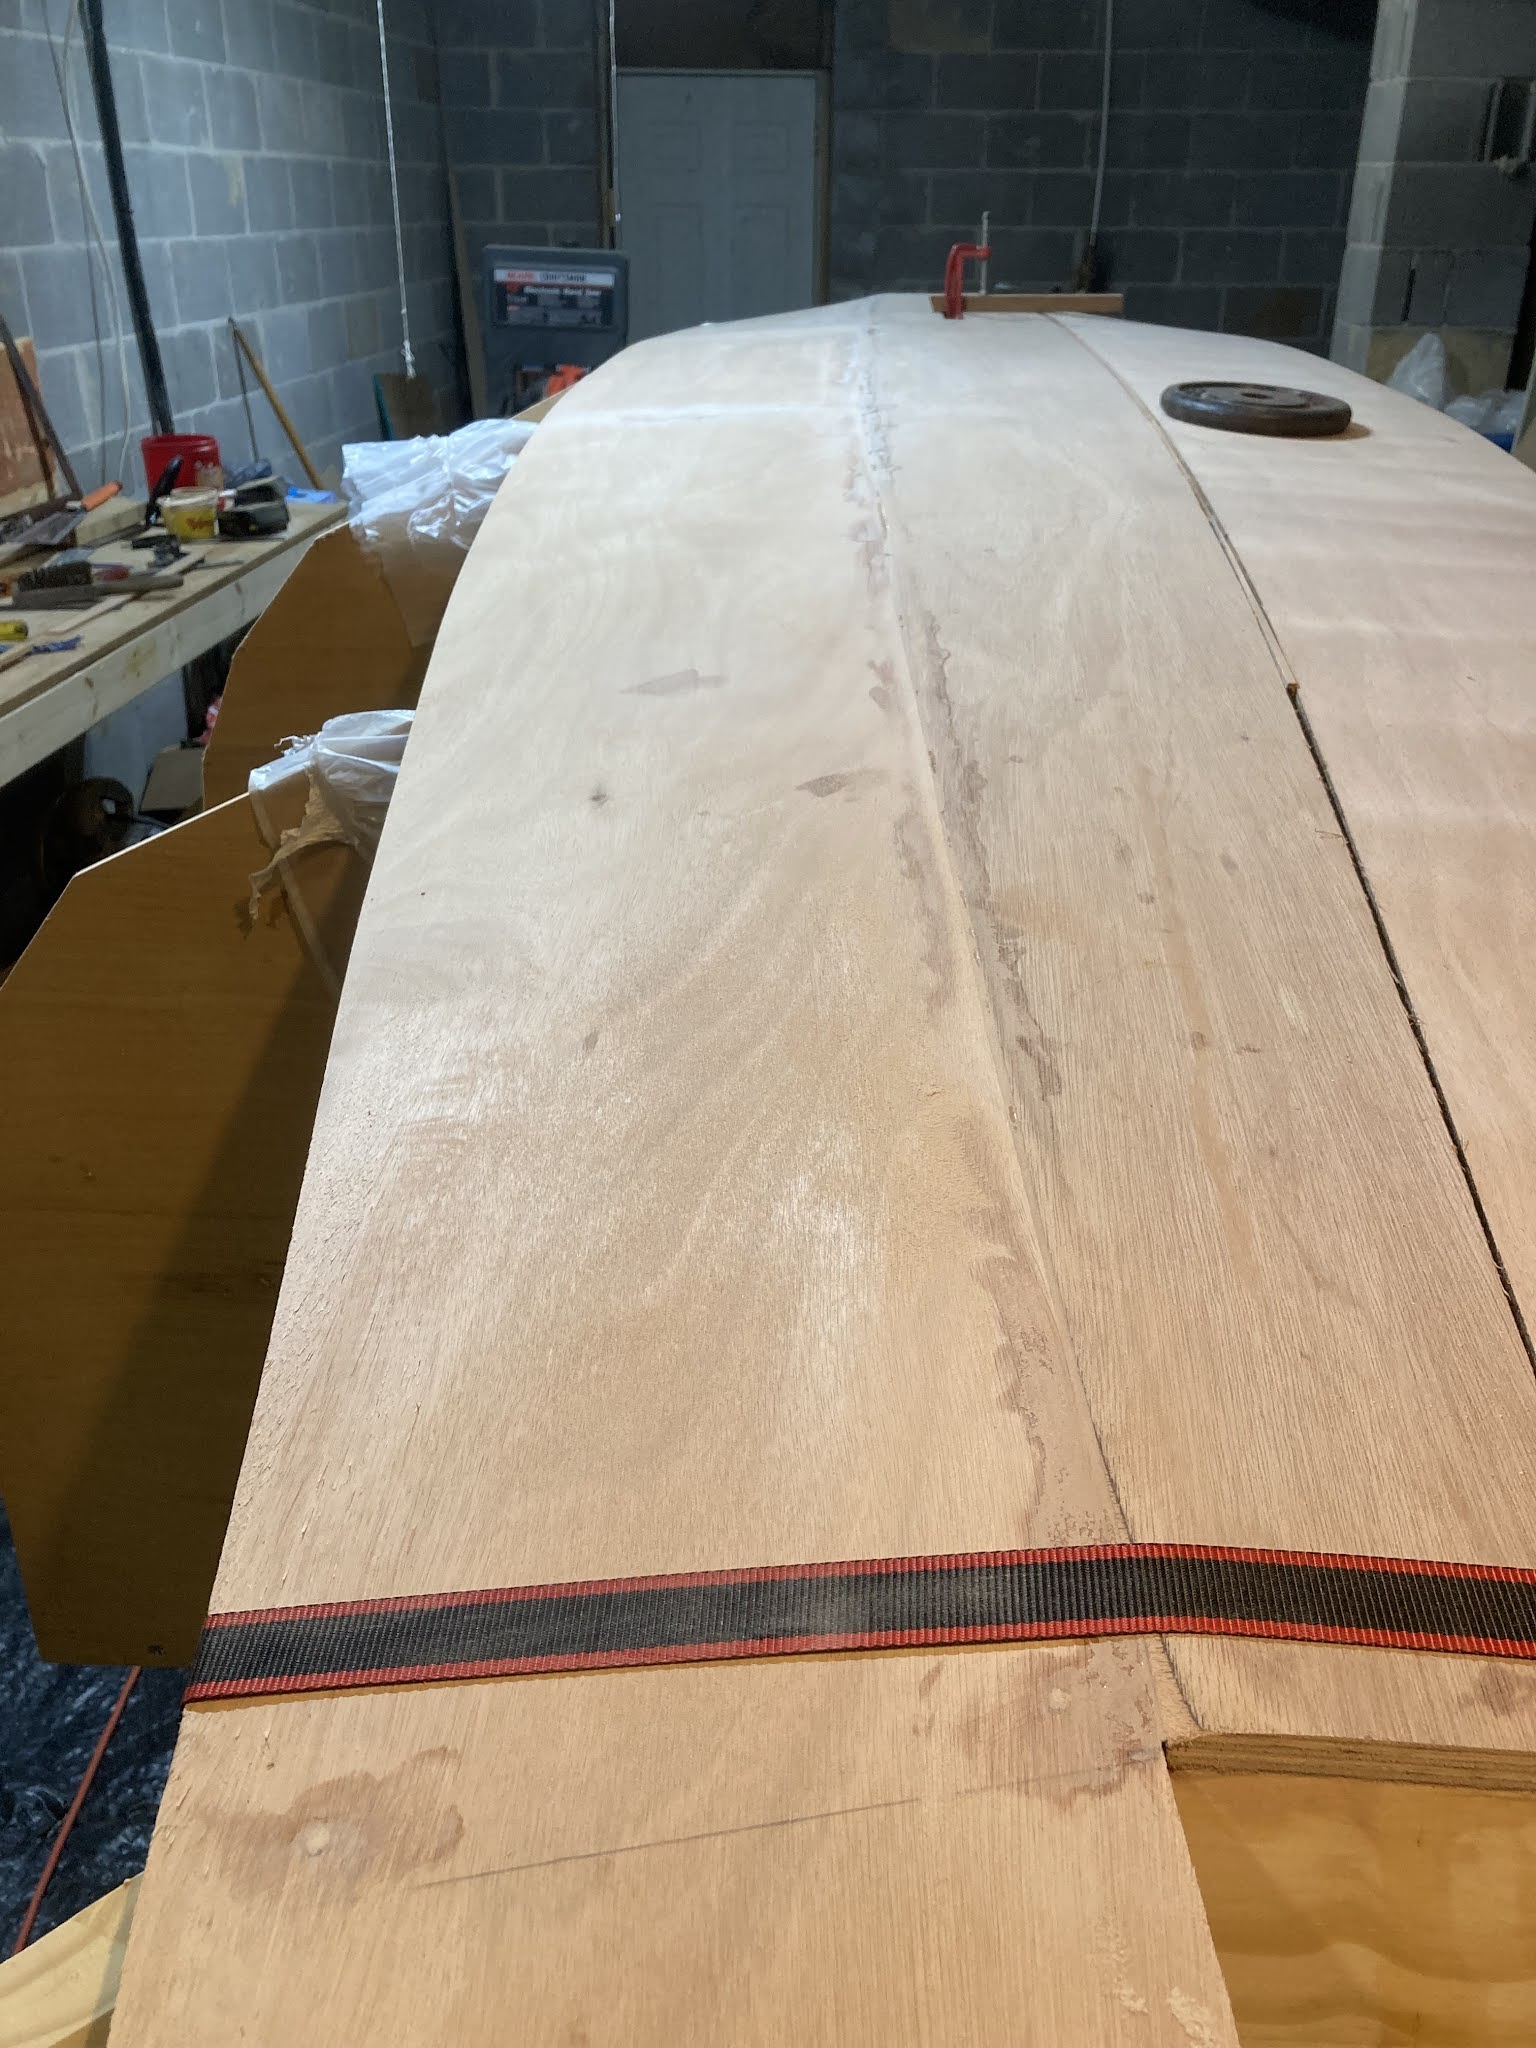
My garboard planks were off by about 1/4" or so. I trimmed one down at the bow to help close a gap and the other I filled the gap with slivers of ply and trimmed the outside edge a bit. Not too difficult a fix with the mating edges of the two planks and the keel plank butting up against one another.

The next planks are overlapping (hence, lapstrake). Any failure to overlap the planks will be a real problem, probably mean I'd have to buy some more ply, scarf etc. etc. I really want and need to get this right. 

Truth is, if I'm only 1/4" off, I'll have enough room to play with since the laps are designed to be 3/4". That would make a smaller lap, but I think the boat would stand up to that. 

What to do? 

There are at least 3 options: go with Clint's measurements, spile using a plywood batten, or spile using a "lattice" method (my terminology). I used the plywood method for the garboards. Whichever method I go with, I could always make a dummy plank with cheap plywood (is there such a thing anymore?) and see if it fits before going with the $100 a sheet ply. 

I've gone to the trouble of prepping for the 2 DIY methods.

Here is the plywood batten pattern.


I doubled the ply to give it more bulk and made sure the ply laid down without twisting or binding before gluing in the middle. You can see screws in the sternmost piece and wedges in the piece toward the bow. This batten needs to sit flat without and forcing. I laid the pieces down from the outside to the  middle and glued the two pieces together with hot glue rather than screwing them together as I did for the garboards.

Then I made a pattern with  battens and cross pieces.


Here they are overlapping each other.


I may transfer both of them to my plywood and see how they compare. I may be able to use my compass and compare while they lay on top of each other.

Are they really close? Or is there a substantial difference? 

I might be able to slip down there later tonight and check but it may be next week before I can tell.  


What Do You Mean - Not Plumb?

You guessed it. The daggerboard trunk is not plumb. Ugh!! I tried my best to make it so. The good news: it is only off by about 1-2 degrees which translates into maybe 1/4-1/2" at seat level. Not too happy with it. I don't think it'll be too big a deal sailing, but, dang, if it don't bother me. It can be fixed but not without some trouble. I think I'm going to leave it.

Sadly, now that it's done, I have figured out a way that I could have gotten it plumb. I should have tacked a piece of ply on the end away from the midship frame that would have "seated" on the keel plank. Instead, I tried to use a tri-square and the keel plank wasn't wide enough for it to land on it flush. My vision was not too good under the boat close-up. I thought it might be hitting plank #1 (which it was and that kept the square from seating properly) but I couldn't see any gap. Oh, well. 

The good news is that it looks square. That really was far more important than plumb. 

Wednesday, October 6, 2021

A Bottle Jack! What?

Tonight I epoxied the trunk to the hull. Now mind you, the hull is upside down, it was a bit tricky. I actually played with the setup last night for a while and went back tonight and actually did it.

Here's where the bottle jack comes into play. I had to have something to hold it up against the bottom, so I cut a 2x2 the appropriate length and used the jack to snug it up along with a clamp and one ratchet strap. Here ya go:


 Oh, the piece of board in the strap is to take up some of the strap to keep the ratchet away from the trunk.

I used a carpenter's square and a tri-square to get it as straight and plumb as possible. It aligned with the slot pretty well. I did have to fill one end about 1/4" and trim the other about 1/8". 

Next I'll fiberglass the bottom three planks.

Garboards Sanded and Ready to Go!

I've sanded the second garboard/keel plank joint. All looks pretty good. 


Will soon be time for some fiberglass. First off, I'm going to attach my daggerboard trunk. Last night I figured out how I was going to hold it in place. I think I've got it. 

Monday, October 4, 2021

Second Garboard

I changed my mind about trimming the second garboard. I went ahead and took it down after marking the plank where it went over the line. Then I went ahead and trimmed it with the Porter Cable saw. BTW: that saw cuts really well through one board. I'll probably only cut one at a time from here on out.

Here is the trimmed plank.


Then I glued it up. I did put some strips of ply in the gap and tried to goop it up good. Just to note: I put masking tape on the inside of the joint to keep the epoxy from running through. It pulled off really easily on the first garboard. I'll be able to put more epoxy in that gap from the inside if it needs it. I'll be sanding it and putting a strip of 3" fiberglass over the joints and finally a layer of glass over the entire keel plank and garboards. The construction manual also calls for a layer of 3" glass on the inside of the joint. Should be good to go when all that is done!


Saturday, October 2, 2021

Checking Strake Lineup

I spent just a few minutes attaching some short battens to the molds to check and see where the planks should hit the stem. Looks ok, so I marked the locations for spiling. 


I also finished gluing up the first garboard. After the first session, the plank was firm and  I was able to remove all screws, clamps and straps holding it in place which gave me full access to the entire length of the joint. 


After a little sanding.


I have fitted the second garboard. 


As you can see, there is another gap. The bow needs to line up evenly with the other garboard, so that was the priority. The bow end of the plank looks pretty good. Toward the stern a gap opens up again. I'm going to leave it and fill with a little strip of ply. It will be covered with fiberglass and paint. No problem. The outside edge of the plank is a wee bit wide, like a couple places 1/8 - 3/16", but I'm not going to fret over it. I do plan to spile each of the rest of the planks individually.

Oh, and if you noticed, I did not use any screws to line up the second garboard.