Friday, September 30, 2022

Trailer Refit

Of course, I bought a used trailer early last year - shortly after I began the build. It's time to fit out the trailer to my boat. 

I've pondered the best way to do it. After much thought and looking at some other trailers (though there really isn't much out there to be seen) I've come up with a plan. 

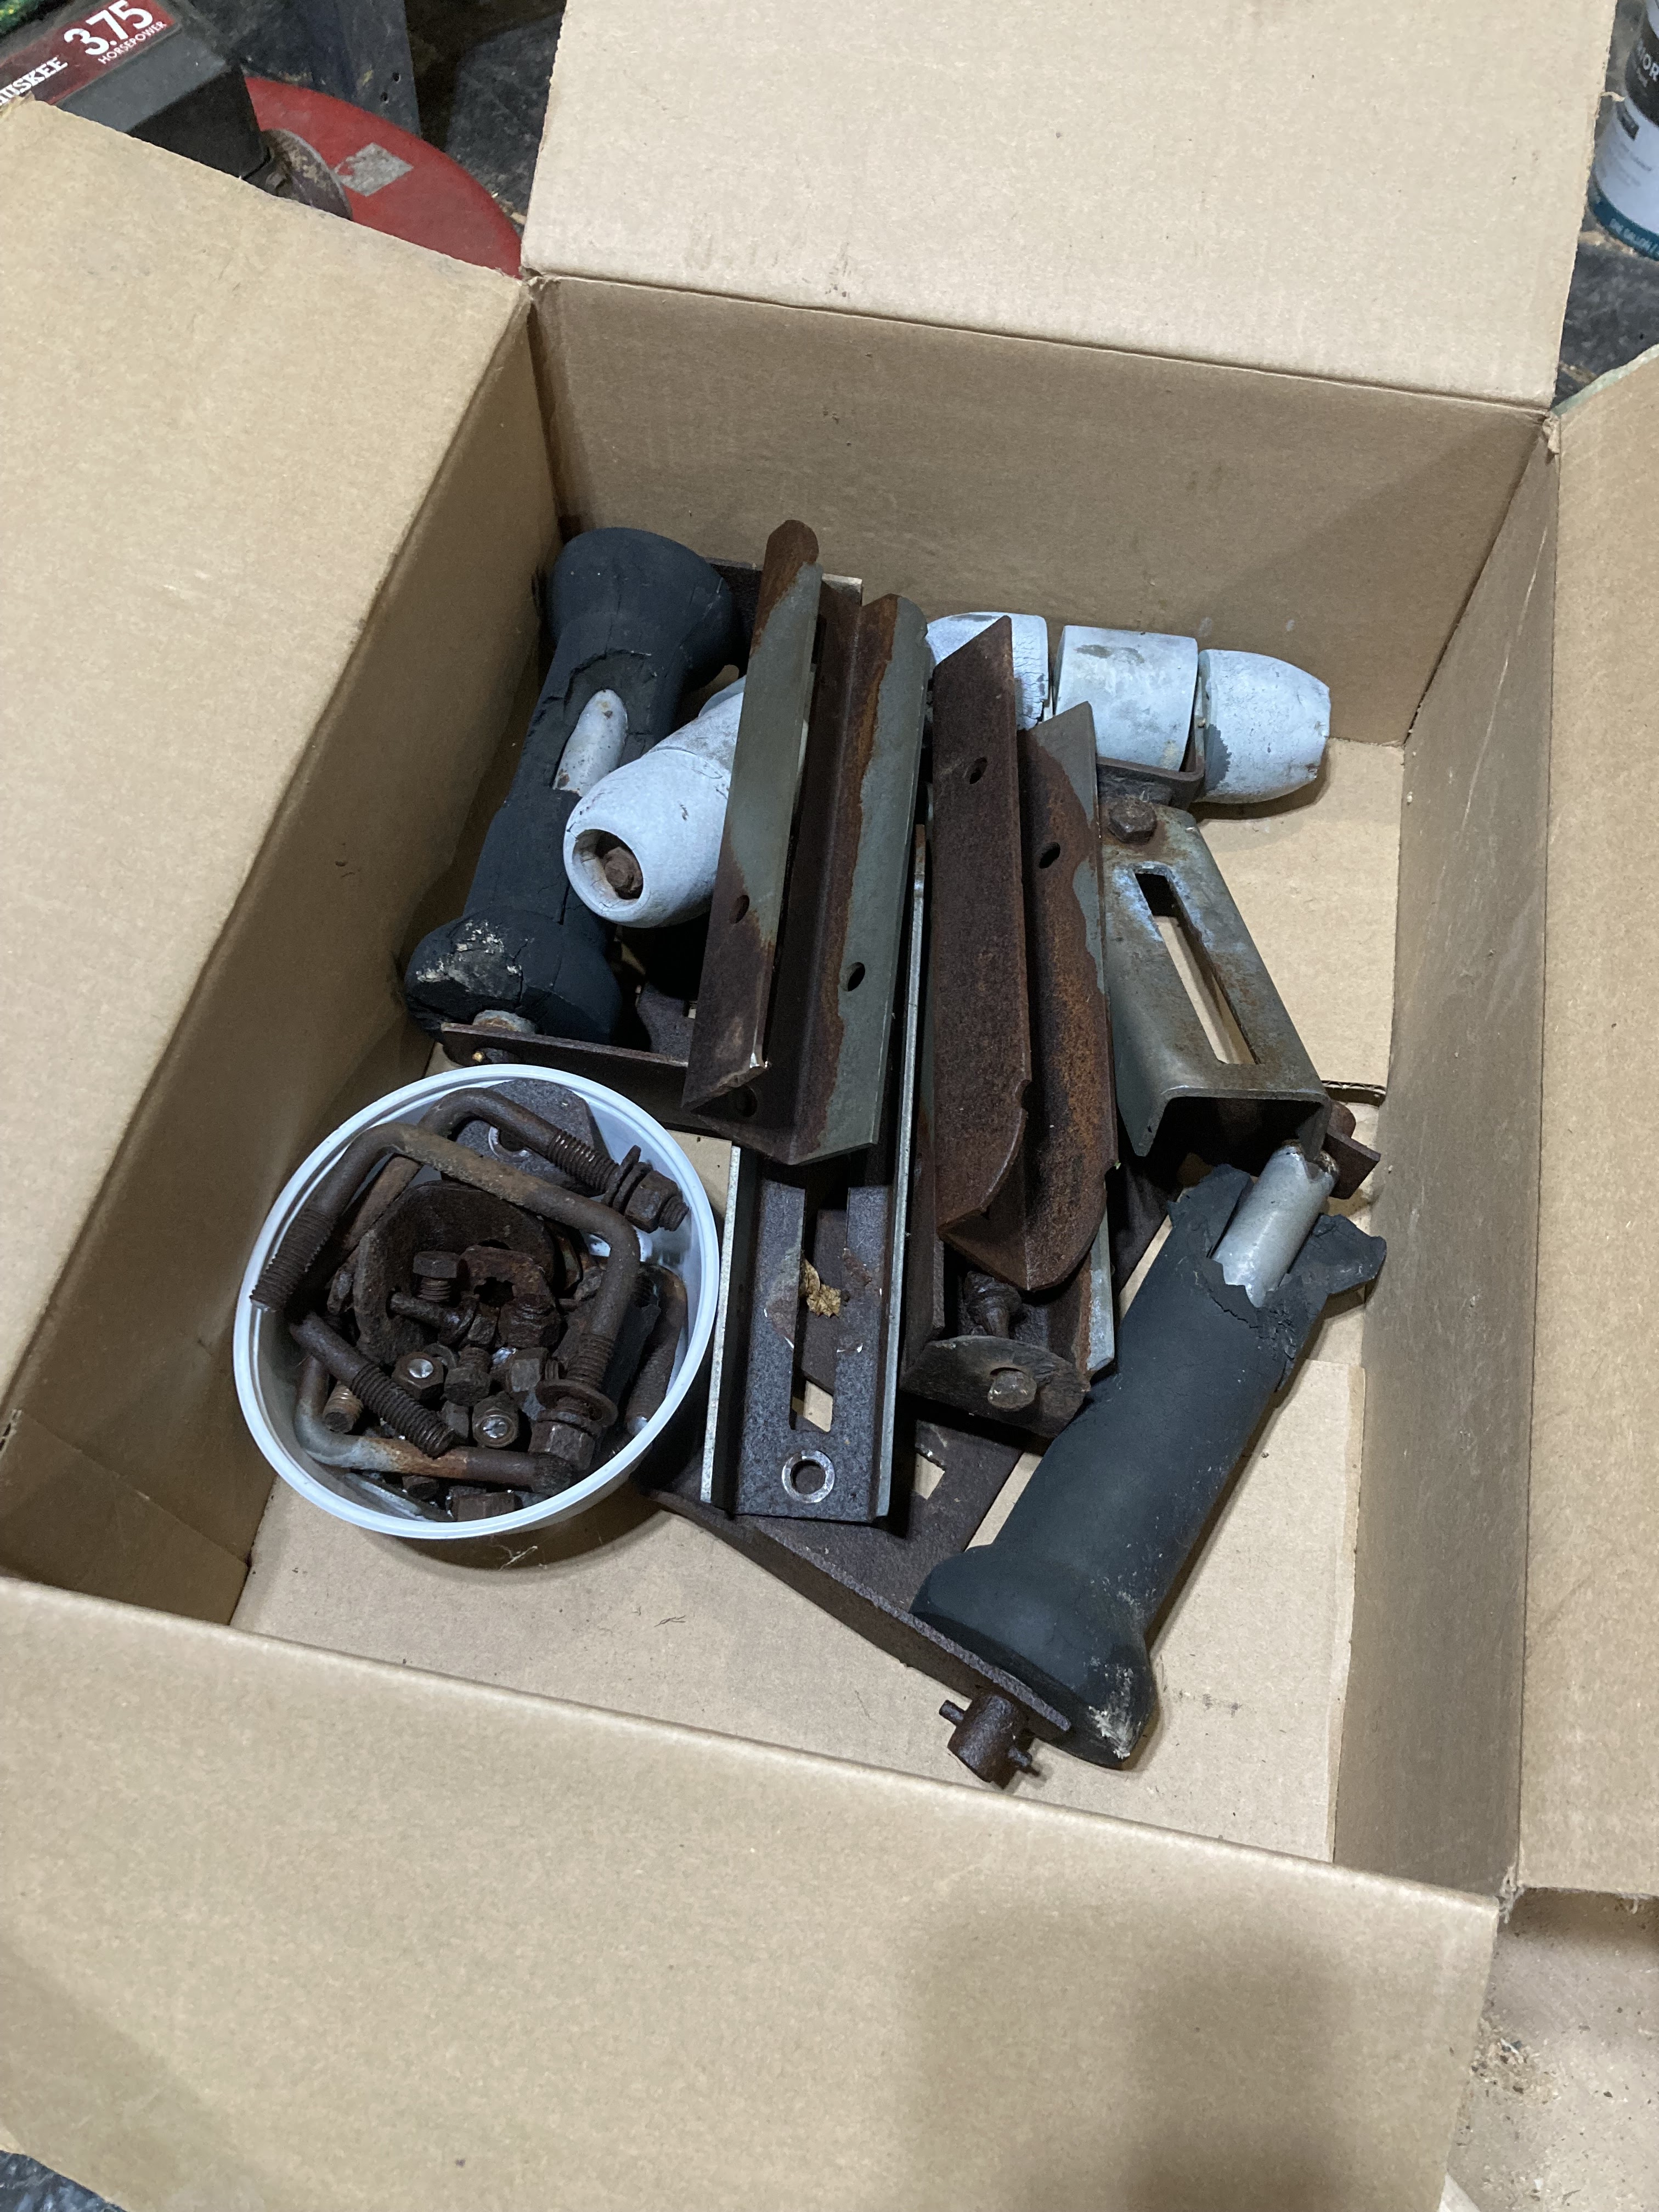
It took two evenings to take off the old fittings and strip the trailer down to its frame. Here's a box full of the old stuff. Most of the old bolts broke. I borrowed a grinder with cutting blade from a fellow church member to cut some of the stuff off especially the roller which had frozen to the sleeves.


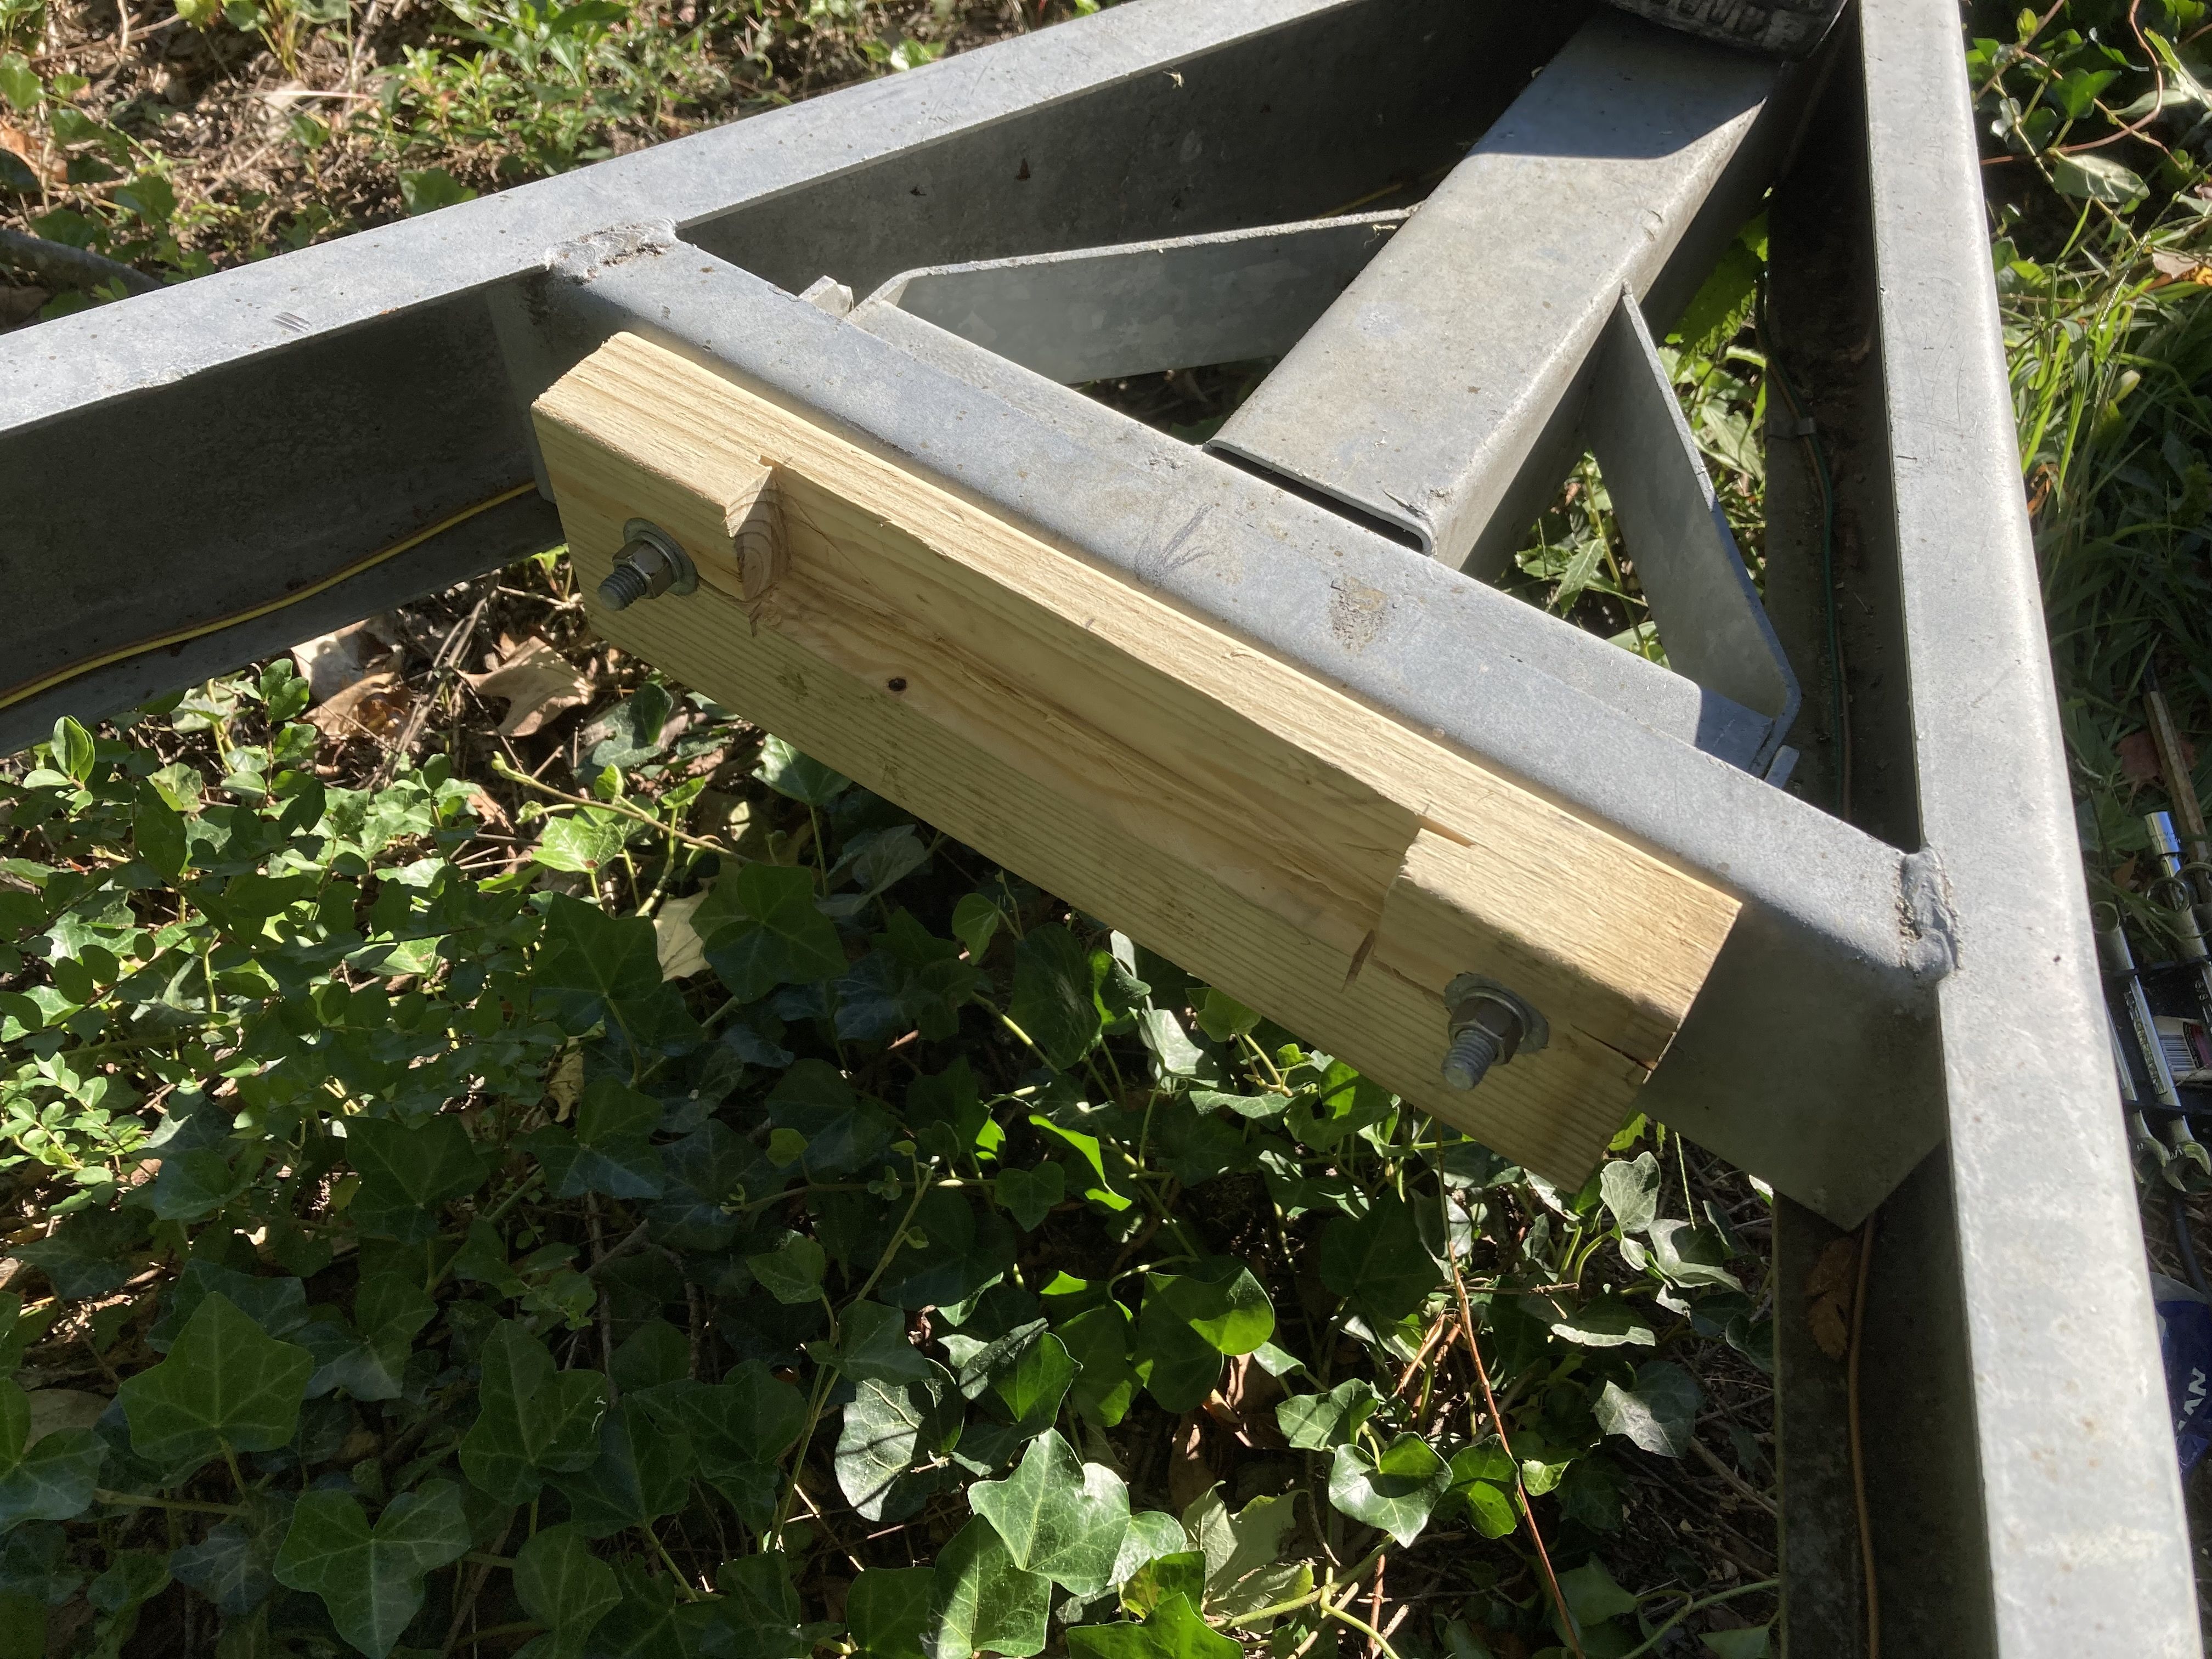
My plan is to put a plank down the middle of the trailer for the boat to rest upon and use some of the old hardware to add bunks. The cross members of the frame have holes drilled all over them. They had used those to attach rollers. I decided to bolt 2x4's to them to give me something to bolt the plank to. Here's the first one. I notched it because this cross member is higher than the rest. The forward part of the plank will end here.


Here all of the short 2x4 pieces are bolted into place and the plank is lying across them. I have drilled the holes to countersind the lag bolts so that they will not sit above the level of the plank. 


Here is the plank bolted into place.


Here is the last cross member. There was a gap at the rear of the trailer no doubt for an outboard which I will not have.


I notched it as well.


Here's a closeup of the countersunk lag bolts.


Today I spent several hours looking for square u-bolts. It took me four stores to find them. Tomorrow I plan to rough-in the bunk supports and winch. Final fitting will have to wait until the boat is on the trailer. 


Friday, September 23, 2022

Exterior Painting

I moved my boat outside planning on spraying the exterior. Before I started I needed to finish up the drain plug hole. I started the hole on the inside. I waited to finish cutting it because I didn't want to damage the exterior fiberglass by pushing the hole saw through it. So I finished cutting the hole and filled the hole with slightly thickened epoxy. I put a block of wood under the hole and jammed a piece of wood up against it to hold it in place. I also put a bowl over the top to keep the top side from getting messed up by the tarp which I threw over it for the night.


I'll be drilling a hole through the epoxy soon to install the plug. The epoxy will keep any water from seeping into the edges of the plywood. 

Because I was going to spray the exterior, I needed to cover the rest of the boat to prevent overspray from getting on anything - in this case rubrail, gunnel and even the inside brightwork. Then I tipped the boat up so that I could paint the keel plank and garboards in a near vertical position.


Unfortunately, I could not get the sprayer going. For one thing, my compressor kept throwing the breaker. After about 3-4 times I gave up. I wound up roll and tipping the exterior. 

I also threw the Kroil to the trailer. I hoping to use most of the fitting for the "refit". First I have to break loose the nuts on all the fittings. I think I have a plan.


Today I painted the cove stripe. Again I had to cover the entire boat to protect from overspray. In the pic everything is covered except the sheer plank. 


Here is the plank painted. I used Krylon Regal Blue. It took four cans and about a dozen light coats. I did not want any runs, drips or errors (so said Johnny Bench). I did have two runs early on but figured out that I needed to turn loose of the trigger when I changed directions. Went fine after that. 


Then end result looks really nice. The surface is still rough from the epoxy coating, but I'll have to live with it. In the long run, I don't think it will matter. I'll still enjoy the boat, and it will still draw the looks. 


Monday, September 19, 2022

Where Did My Boat Go?

We moved the boat out into the yard last night. Getting ready to finish the exterior painting. Exciting days!


Interior Painting Done

After 25+ hours of painting and sanding I'm finished with painting the interior of the boat. (I may sand the seats and tops and spray them later but we'll see). 

This was a back breaking job. Bending over to paint the bottom of the boat and under the seats really wore on me. The hard to reach places didn't get a lot of paint: I'll tell you that. The bottom which will take the most abuse got 5 coats: 3 primer and 2 finish coats. 


This is the hole I'm cutting for the drain plug. I'll finish it when the boat is turned over. 


Thursday, September 15, 2022

Priming Done!

I basically finished the priming yesterday morning. Today I lightly sanded the primer coats, taped some of the edges and reinserted the removable floor boards and covered them with plastic.


I wasn't going to use tape. I usually just do edging freehand, but I have some long lines and want it to be as smooth as possible. I'll use the tape just for the first finish coat. On the second coat I'll not try to paint exactly up to the edge. 

I got a head ache and nausea painting under the seats the other day. And I still need to paint the bottom of the seats. I figured I can lay on the floor boards and do it a little easier. The plastic will save them from any drips, which would be impossible to get off should I drip or spill. I'll remove the floor boards once I do under the seats and finish the floor itself. 


I did some more work on the posts. I decided that I'll let the lower end of the mast hang from the front of the boat rather than the rear. My big boat does it this way. It makes sense seeing that the big end goes into the mast step. This meant that I had to change the height of the post because the aft seat and the front flotation tank are not the same height. I cut 6" off the taller one to make it the shorter one. Wasn't too difficult. The band saw did the trick. 


In the morning I'll be ready to go straight to painting. Should be able to do the second coat quickly on Saturday.

Oh, yeah. I primed the daggerboard also.


I'm hoping to move the boat into the yard on Sunday so that I can finish painting the exterior. I also need to locate the mizzen mast step. 


Tuesday, September 13, 2022

Primer and Posts

Took a day off from work and got in a full day on the boat. Still thinking I'd like to take her to Dayton for the Glen-L Gathering.

I had put down a coat of primer on the floor. Today I put down one full coat on the entire interior. And, boy, is my back sore. Also got a headache and nausea from painting "upside down". You've almost got to be a contortionist to get to some of the nooks and crannies on this boat. I had hoped to finish the primer tonight, but I spent too much time on the mast posts.

Here she is after the coat on the floor.


And here she is as of tonight.


I'm going to need a way to transport the mast. I saw posts like these on a thread on the WBF by a guy who is building a Fulmar. I liked them so used some of my scrap ply and lumber salvaged from the buildings next to church and built some for myself. I think they're going to work great. 


You might notice that the two are not alike. The ply and stock lumber are reversced. When I started I was measuring the diameter of the mast and matched the cradle of the posts to that. However, I figured the measurement on the outside of the post! Eeek! So I had to scrap some of the pieces and finagle the others a bit. Once they're painted, only the most observant would ever notice. 

I may get up in the morning and do the final primer coat. That would mean Thursday and Friday would be the finish coats of the Glidden Porch and Floor enamel. 

I called about adding the boat to my insurance and we're getting that taken care of. I should register to boat as well. And I still have to figure out the trailer. 


Saturday, September 10, 2022

Three Coats

Three coats and I'm calling the brightwork done (I do have to put a coat on one side of the rudder blade - 5 minute job). Twelve hours total not counting the sanding to get it ready, just the sanding between coats.

The finish has tiny bubbles in it. Rats! Maybe a foam brush would have been better. Little Bit had such a good finish on her. Maybe later I can try again. If I can only get the seats and tank tops to look good... 

Here are my deck plate buttons - four per plate.


That mahogany sure looks good! Would have been nice to have some more. I actually made my quarter knees out of it and they look good too.


And here's the boat. The brightwork will show up much better once the hull interior is painted.


Here's the workbench with some small pieces of the boat: tank top, rudder pieces, deck plates, buttons, tiller, tiller extensions, daggerboard plug and mast gate. 


I'm going to experiment with the primer and white a little bit. I'd like a good finish on it. Hopefully I can get it done this week. 

The following week I'd like to maybe take the boat to Dayton for "The Gathering", an annual messabout of Glen-L boat builders. I'll have to get a few things done though, like insurance, the trailer done, and maybe registration. 


Thursday, September 8, 2022

First Coat!

I got my first coat of urethane on my brightwork today!!! Been a long time coming. 

I decided to go ahead and attach my strap eyes and fairleads first. I'm just going to paint them white so no need to wait. Eight fairleads and twelve strap eyes.


Then I went to painting. It looks much darker with that urethane.


My bench is loaded with the little stuff including my tiller hanging from the shelves.


It took over 4 hours. Next coat may go a little quicker but I've got to lightly sand the surfaces first. Not sure whether it's going to take 3 or 4 coats. Spars took 4. 


Tuesday, September 6, 2022

Time to Paint!

I believe the moment has come: it's time to paint!!!! 

I've spent the last two evening sanding. It's quite the job. Not really much to show in the way of pics, though I did add a 1/4" doubler to the forward tank top overhang. I had not noticed it on the plans but there it was. I did not extend it all the way across, just about 10" from the center line of each side. It should be enough. I actually can't see it on the other CIY 16's I've seen on the forum. Could be there. That part of the boat will carry a lot of load with the downhaul anchored there. 


Here's a pic of the drain plug doubler. This 1/4" extra will allow me to install the plug and without having it extend beyond the bottom of the boat. Of course, it will leave a little water in the boat if I am indeed needing to drain it. 


And here are some "tools of the trade": my epoxy and some mixing spoons. I've been doing a lot of little epoxy jobs the last little bit, so some small measuring spoons have helped. 


Just a note: I chose not to fill the weave in the fiberglass cloth on the floor. Most of it will be unseen anyway.  I guess I could roll on another coat of epoxy that would cut down on it. I'm figuring it will look and perhaps act like nonskid. Maybe just fooling myself, but I don't think it's going to bother me. 

Painting is going to be tedious, but here goes. 

Saturday, September 3, 2022

Is It Time to Sand?

Pushing to do some painting, but not quite yet. Tonight I spent a couple hours sanding the gunnel, inwale, rub rail and some joints (like where the side bench seats meet the aft seat and middle thwart. I sanded the top of the daggerboard trunk and planed the top edge of the daggerboard while filling in some "low spots" with thickened epoxy. I also did some fillets at the transom. Finally, I epoxied a 3" square piece of 6mm ply under the center thwart near the midship frame which will be the location of my drain plug. The plug is 1/2" deep; hence an extra 1/4" to go with the keel plank. I plan to cut a hole about 2" in diameter, fill it with epoxy and then cut the hole for the plug. That will prevent the ply from getting water into it and rotting. I've also bought a tube of 3M 4200 which I'll use to seal it as well as some other fixtures (like gudgeons etc)

Here's the only pic from tonight. The paint can along with two 5 lb. weights and some extra ply are sitting on top of the 3" square piece of ply for the plug. 


Next step is to sand the plywood interior and then PAINT!