Tuesday, May 24, 2022

Cleats, Cleats and more Cleats

There are lots of cleats in this boat. I'm still working on the aft section. Tonight I just simply worked on cleats. I'm trying to be very careful about getting everything on the same plane. I pulled out my 4' straight edge to help with that. Once I had the cleats set up, I double checked them. Good thing! Some were off. I guess the lines I drew were off. But I think I got them pretty even. 


The stern posts are not glued in yet. They are just sitting in place. I'd like to finish this up by the weekend. I think I'm going to leave the mizzen mast step until I take the boat out into the open where I can check the rake (probably main mast as well). We'll see. 


Saturday, May 21, 2022

Little by Little

The aft section is a bit complicated. I decided not to try and glue up too much at one time. I felt it was better to get the cleats on properly on the stern posts, then we can proceed. 

Tonight I glued up the cleat on the forward and rear parts of the lazarette and the cleats on the upper portion of both posts.

A couple of shots:


Of course, the lid is already cut out. I'll being gluing up some more cleats and cutting out the lids for the two flotation chambers this coming week. Then it's on to the side seats!


Friday, May 20, 2022

Some Brain Work

I've started on the aft section of the boat. It is a combination of seat, flotation chambers and lazarette.  It has been a bit confusing figuring out how all the pieces should fit together and how to size them. Like some of the other "fitting" pieces, I'm usually off some fraction of an inch. 

I spent some time attempting to get the correct line where these pieces will land on the transom. Then you have the differences in thickness of the lazarette and the flotation chambers. There are bevels, angles, pieces to fit around etc, etc.

But I made good progress the last two days. Here I am cutting out the lazarette lid. I like to use guides to get a straight cut, especially in such a visible piece.


It fit very nicely. It hit the line I had drawn on the transom and was just about square to the transom. Wonders never cease!


Of course there has to be cleats, cleats and more cleats. Here are 3 that will surround the lazarette. I also cut out the stern posts. In the pic you can see a rough shape and tickler sticks. 


Transferring the points to the plywood.


Here's the lazarette cover. I used Clint's dimensions for the lateral measurements and my measurement for the length. 


Here it is dry fitted. I'll still need to cut a cleat which will run across the lazarette about 6" from the transom. It will provide stock in which to attach the hinges for the lid of the lazarette. The aft 6" is fixed and will be the mast partner for the mizzen mast. 


Still much work to be done on this part of the boat!


Wednesday, May 18, 2022

400 Hours!

I passed the 400 hours mark on Friday! Now the question is: can I finish by 500 hours? I think it will be close.

I got the midship thwart glued down last night. It looks good.


I also shaped up the stem and midship "horns" (not sure what to call them - maybe tabs). 


The boat is looking good!


I still have to finish the inside of the tank, but I'll wait and do that when I have the aft tanks ready to go. Oh, I also glued up the aft bulkhead repair which you can see if you look closely.

And for the first time I sat in my boat!!!! 


Thrilling! She feels so big compared to Little Bit.


Monday, May 16, 2022

More on the Interior

I was on vacation the past 8 days. I was able to get some good time in on the boat build.

On Thursday I worked on my deck plates. I asked on the WBF about some suggestions on how to seal the plates. A couple responses flatly stated that I should not make my own. Others said go ahead. This is a budget build and I can save about $50 doing my own, so here goes.

In the first picture I have cut out my plate using the same guide I used to cut out my rudder. The plate is sitting on some scrap ply which I used to cut out a ring which will give the plate a place to land.

In the second pic you can see the hole, plate and ring. The bit didn't break but it did burn the wood. I sanded the worst off which increased the differential between the plate and the hole. But it should work. I'll find something to use as a seal and make some "buttons" to hold it in place.


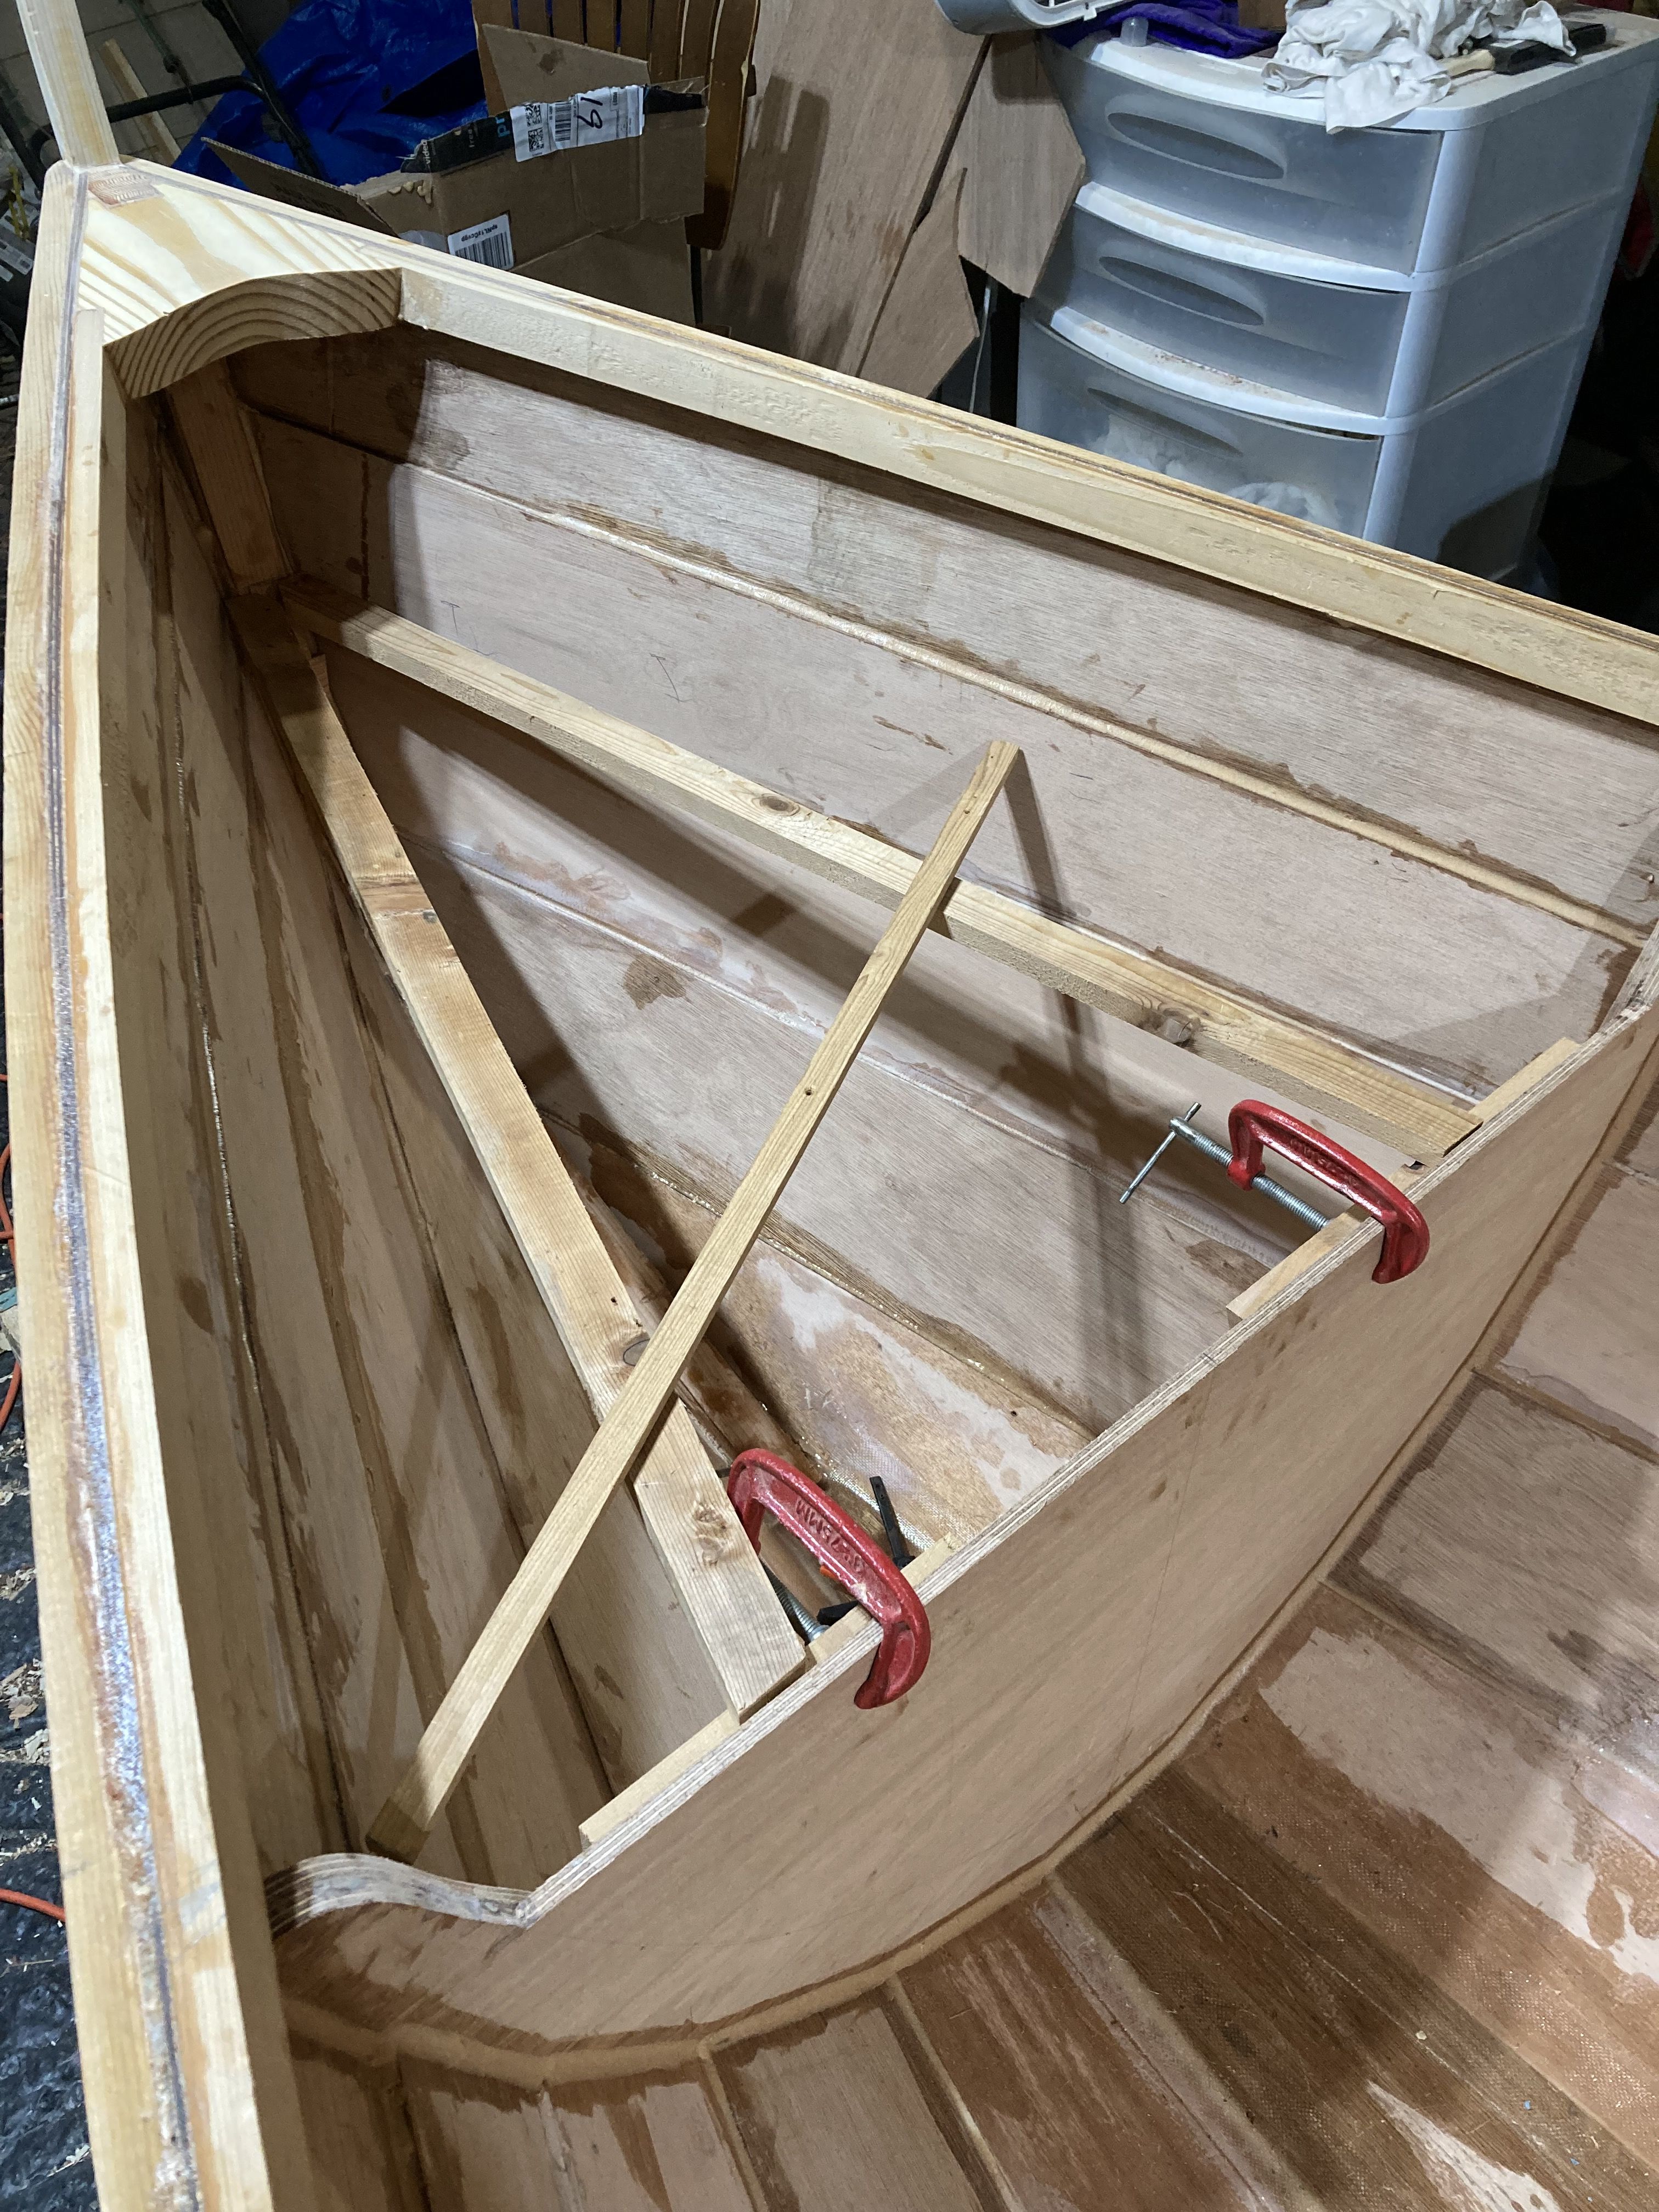
 I also worked on the midship thwart. I took some more scrap ply, cut some tickler sticks, clamped a 1x to stiffen it and got a fit. 


This afternoon, after returning from our mini-vacation, I actually cut out the center thwart, a doubler and a strip to go under that on which the floor will rest when used as a sleeping platform. I actually called Clint to get some clarification on how to set that up. The doubler is 6 mm ply, the next piece is 9 mm ply. The seat itself plus the doubler will equal the thickness of the floor boards giving a nice smooth sleeping surface (theoretically). The third piece extends about 3/8" beyond the seat edge giving the floor boards a place to rest.

This evening I glued up the pieces, the cleats for the thwart and the repair of the aft bulkhead.


The triangular piece of ply in the pic above is being used as a straight edge. It was a factory cut edge and perfectly straight. I was measuring the distance between the thwart and the top edge of the sheer. Nothing on this boat is quite square or plumb, so I felt that was the best way to set it up. 


The last pic shows all of the things I glued up this everning. You can even see my two rings for the aft deck plates. I cut them out while I had the guide and rotozip out. Note that the 1x2 across midship is only a temporary brace. It will come out as soon as the thwart is in place.


I plan to glue down the thwart in the morning. 


Tuesday, May 10, 2022

Glue-up Day

Today was glue-up day. I had already cut out my bed logs, trunk rails, cleats, forward support beam and a strip of ply to fix my aft bulkhead. The cleats and beam had some bevels. The rails had a beveled notch each. I cut a little block of wood with an angel that matched the notch, set the table saw blade at the correct height and cut the notches with several passes over the blade. Here are a few pics. The last pic is of the tank top sitting in place. Got a couple tings to do before gluing it in place. 


Friday, May 6, 2022

Oops!

Discovered a pretty big gaff this morning! I've been thinking all along that the aft bulkhead was low. I thought to myself that it would make a very low seat. 

On the plans it is supposed to start on the same plane as the daggerboard trunk, so this morning I took a small, long board and checked. It is about 2,1/2" too low! How did that happen?

I went and looked on the plans. Remember, I built the bulkhead way back near the start of the project. Going back to the plans there is no measurement for the height of the bulkhead where the seat is supposed to be. I took a measurement from one of the landing surfaces. Presto! Wrong!

Here's a pic with the plank and a closeup of the miss.


Fortunately this will be a relatively easy fix. Actually, I have the cut out part of the bulkhead. All I've go to do is cut an overlapping part, maybe 3" wide, that will go on the inside of the bulkhead and glue it in. This might wind up helping because there was supposed to be a 1/8" recessed part of the top edge of the bulkhead which will allow for the 1/8" difference in the lid thickness vs the side tank lids. When I cut it out, I messed that up. Now I can fix it too!


Here is the piece set in place. I just have to cut it to the proper dimension and glue it in.


Thursday, May 5, 2022

More Interior Work

On Monday I cut out the bedlogs and trunk trim. I'm waiting to glue them up until I have more to glue. I also need to cut the notches that the midship thwart support will rest upon.  

On Tuesday I began work on the forward trunk top. That's quite a job measuring, fitting etc. I've spent several hours on it already. I think I've just about got it. Before glueing it all up, I need to cut out and glue up my deck plate. That will be interesting. I might use some scrap plywood for the doubler on that.

I started with a scrap piece of ply, cut out some tickler sticks and hot-glued them to the ply. The fit was pretty decent. In the third picture you can see some temporary boards that I used to get the proper plane for the top. 

Not pictured is a support beam that I'll glue in before I glue down the top. I've also cut out the cleats that the top will rest upon. I'll also have to epoxy coat the flotation chamber and probably paint it as well. 

One more thing I'll do is shape the back edge of the top. It over-hangs the bulkhead by several inches and will be the platform for the mast partner. It will have a curve to it and a half-circle cut out the same diameter as the mast. 


We're moving along!