Monday, November 28, 2022

Ready Yet?

Thanksgiving came and went and the boat didn't get wet. I thought I was going to be able to launch on Saturday but schedules and an emergency surgery of a church member squeezed it out. Fact is, I probably wasn't quite ready anyway.

Today I spent three hours with some "final" prep. I ran the lazy jacks through the eye hook, sorted out some lines and put up the mast again. It all looked good and I liked the way it all came down. We'll see if the process is repeatable without getting lines all tangled. While the mainsail was up, I vacuumed out the boat. Amazing how many leaves got into the boat with a tarp over it. I guess they blew in through the slightly open ends. 

It's been a week since I posted and I was busy with little details. Here is a pictoral walkthrough.

I hoisted both sails! Looks pretty good!


The rigging of the sprit boom on the mizzen.


I rigged the mizzen sheet through the boomkin. I think I'm going to replace that clam cleat with a cam cleat. I may replace the clam cleat on the mast with a horn cleat. You can also see a safety line tied off to an eyebolt just aft of the mizzen mast. This goes to a cleat on the mast which will prevent the mast from coming out of the partner.


I rigged the downhaul. I used spectra for the lashings on this. The line will be under a big load.


I attached the permanent mooring cleat. I had to put it off center due to some framing on the inside of the flotation chamber. It'll work fine and looks ok.


While I working the day before Thanksgiving, these two birds walked by. We've seen them numerous times before. Guess no one told them what time of the year it was. LOL


I attached the tiller extension. I used a 1/4" line tied with a rolling hitch, put a washer between the tiller and extension and secured it with a velcro strap. Gonna be watching that hitch. I may switch to a thumb cleat and bungee cord.


I tried doubling the 1/4" bungee cord that I had but wasnt' satisfied. I'm going to used a regular line. I may get some 5/16" bungee and do it as called for in the plans.


I had attached a cleat for the mainsail downhaul. I wound up moving it over an inch because it was too close to the mast to easily cleat off the line.


Here's my rope handle for the daggerboard. It should float so may not be very necessary, but it's there.


I ran my two bridles for the mainsheet. After putting a loop in the forward bridle, I rethought it and took it out leaving just a straight be of rope. 


Clint suggested holsters for the oar locks. I screwed two of them on the aft bulkhead just underneath the side benches. 


Monday, November 21, 2022

Oh, The Details of Rigging!

I spent three and one half hours today working on the mainsail's rigging: lashings, reef loops, reefing lines, halyard, lazy jacks, etc. I actually ran out of line. It takes far more than you think. I have some old line that should do, at least temporarily. I also went with the 1/8" line for the lazy jacks. Hopefully that will do though I had planned on 3/16" line. I used my spectra (only ordered about 12') for the tack lashing and downhaul lashing, two places I thought the low stretch would do the most good. I have one more lashing to go on the boom for the mainsheet and the bleater. Once the mast is up, I'll rig the downhaul. I have yet to hoist the mizzen and rig the boomkin with mizzen sheet. Again, I have some old line that should work. I lashed the mainsail to the yard a few days ago. Still waiting on the fit for leathering the yard and boom (I may add leather to the mast instead).

Just a few pics. 

Sail lashed to yard, boom and mast laid out.


Outhaul rigged. Not sure I like that clam cleat. Might switch to a horn cleat.


Tack lashed to boom with reefing loop in place on the second reef.


Mast and yard showing halyard arrangement.


Hoping to launch Friday, but the forecast is sketchy. We'll see. 


Friday, November 18, 2022

Getting Real Close!

Getting real close to finishing up this girl!

Last night I laced the mizzen sail to the mast. Only question is how tight to pull those laces. Might have to see it in some wind. I used a daisy chain to lace it on. 


When I strike the rigging, I plan to leave the sprit boom attached and roll it up in the sail attached to the mast. Looks pretty compact. I'll strap it to the seats for transport and storage along with the mainsail and other spars. Might at well wrap up the boomkin with the mizzen as well. 


Today I spent about three hours trying to finish up the hardware on the boat. I worked on the mast partner. It has turned put pretty nice I think. I did have to trim the gate a bit. I'll probably stick just a small strip of leather into the partner to take up just a wee bit of slack. No problem. 


I had to attach the mooring cleat off center. It would not work easily on center due to the framing underneath the flotation tank top. I think it will be fine there.

I also attached the clam cleat in front of the boomkin and an eye bolt just aft of the mizzen mast. 

This evening I doubled up my bungee cord by sewing a second length to the cord in a postion that will put it between the gudgeons. I think this will give me the extra pull that I don't have (I have 1/4" bungee vs 5/16"). We'll see tomorrow. 


The whipping is due to my failure to singe the end of the bungee after cutting it. It really wanted to unravel. I purchased a small metal cleat to attach to my rudderhead for the bungee. Hopefully this will do the trick. 

I'll post a couple more pics for this post tomorrow. 

The only significant thing left to do is finish attaching the mainsail to the yard and boom and running my lines. Once I do that, I'll know where to sew my leather onto the yard and boom. I'm going to ask Clint or maybe the forum about leathering the mast instead of the boom. Seems easier to me. 


Monday, November 14, 2022

A Little More Outfitting

I'm just about finished setting the boat up for rigging. I did the boom tonight and finished off the yard.

Here is the aft end of the boom. The eye strap is for the outhaul which will run from the strap to the clew, back to the cheek block and up to the clam cleat on the side of the boom a little forward of the aft end. There will be a carabiner on the end of the outhaul which will clip on to the clew (or a loop tied to either of the reef cringles if reefing). The hole is for tying off the mainsheet to the boom.   


Here is the clam cleat on the boom. 


Here is the forward end of the boom. The tack of the sail will be lashed to this end. 


I also cleaned up the end of the yard that I had to repair with some epoxy. It turned out fine. 

All I have left to do is finish up the mast partner, attach a clam cleat for the boomkin and eye bolt for the mizzen, figure out my bungee cord for the rudder and then rig the sails!!!

I ordered the correct size eye strap today along with a carabiner and 12' of 1/8" spectra line. The eye strap is for the partner, the carabiner for the outhaul, and the spectra for whatever I can imagine where low stretch line is a must - perhaps some of the lashing. 


Saturday, November 12, 2022

Setting Up Rigging

I've been busy the last little bit setting the boat up for rigging. That means leathering, drilling holes, attaching hardware. 

Let me post some pics and comment on them.

I made a mockup of the boat and placed all the hardware where it needs to be. Gave me a spot-on readout of the setup. After doing this I made a trip to the hardware store (again) to buy some screws, nuts and bolts. I'm still short a few pieces.


I leathered my oars. They came out pretty nicely I think. I did mess up a piece of leather. I used the piece of paper method to make a template and the leather came out 1/2" too short. I think it was the bulk of the underside of the leather that made it come out that way. After that I used the leather itself. I saw it done both ways on Youtube videos. I was albe to use the messed up piece for my buttons, so not a total loss.


I went to work on the mast partner and mainmast/sail setup. Here is the downhaul cleat mounted on the forward bulkhead and the backing plate epoxied into place with the bolts and fender washers visible.


Here is the 3" cleat on the sprit boom for the mizzen. The snotter will be tied off here.


I think this is the hole at the end of the sprit where the mizzen sail will be lashed.


I sewed a piece of leather on the mast where it sits in the partner. I used a "tourniquet" on the leather to keep the stitches tight as I moved down the lacing. 


Here is the mast obverse of the masthead. The two smaller bolts/nuts are through the fairlead which will serve the mainsheet. The larger one is to an eye bolt which will serve be a part of my lazy jack setup.


Here are the fairlead and eye bolt.


This is the 5" cleat attached to the mast where the halyard will be tied off. I put a little 3M 4200 under it. 


This is the lower end of the yard. It requires two holes: one to lash the sail and the other to tie-off the halyard. I tried to drill a pilot hole but that didn't turn out so well. The larger bit grabs the wood instead of cutting it when you have a smaller hole. And besides that, it doesn't necessarily follow the path of the pilot hole. I messed that up. Here is where the wood shattered between the two holes. I filled the gouge with epoxy. I'll sand it later. 


That's about it for now. Soon I'll be lacing & lashing sails, lashing blocks, running lines and hoisting the sails!


Saturday, November 5, 2022

Mainsail Done!

Thursday I did day two of the sewing project. Robin stayed home so I was on my own. In her defense, she offered, but I felt I could take care of the rest of the project. After (re)learning how to load and thread the bobbin, I was good to go. I finished the sewing on Thursday. On Friday I installed the grommets. Much to my alarm, I forgot to install the grommets on the head of the sail, so did that this morning (as well as replace the grommet on the tack where I forgot to include a washer - my wife declares I'm losing it!).

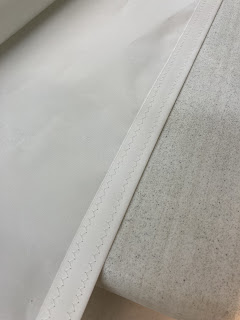
I sewed the remaining three sets of patches, one on the tack and two reef patches on the luff. Then I sewed the "tape" around the entire outer edge of the sail - approximately 45'. 

The key to sewing a sail seems to be to get it up off the floor so that there is no drag on the material caused by it hanging over a small work surface.

Dacron is very slippery and will try to slide off the tables quickly. At one point in the sewing I was using eleven 6' tables. On day two, I actually set tables on top of tables to get my work plane on the same plane as the sewing machine. And because my sail was about 14-15' long, I had them lined up three on each side of the sewing machine (the one pic shows 2 but I added another at each end before I finished).


Sewing the panels together as well as the "tape" around the outer edge was actually the easiest part. You simply roll up the sail leaving the part to be sewed visible.


As seen above, I used masking tape to keep the sail rolled up while I sewed.

The patches (reefing and corners) are the hardest to do, especially the patches on the interior of the sail. In those cases you have to do some folding and bunching. My fabric is no longer wrinkle-free, but it's not too bad. Won't stay wrinkle-free for long anyway.

As you are building your sail, you stick the parts together as you go with double sided tape. They call it "Seamstik". You sew two panels together, then two more til they're all paired, add the interior parts as you go (the ones that don't fall on seams), and finally sew the pairs together into one big sail. Then you finish the patches that fall on the seams. The "tape" around the outer edge is last. Then, of course, there are the grommets to add.

My wife did help. She spent about 7 hours with me to start. She did most of the patch work. I taped; she sewed.

The sewing job is not perfect. Most of it is respectable, I guess. But apart from up-close examination, it will be fine. Most of the job went fairly smoothly though there were a few jams, rat's nests, etc. Our machine did a fine job. Chugged a little but there were times it was sewing through 8 layers of fabric!


Here's one of the grommets along with the grommets on the head of the sail which will be laced to the yard. I used 1/2" on the corners and 3/8" everywhere else. The grommets I had on hand were not the spurred ones. Kinda wish I had used them. Didn't think about it when I ordered because I knew I had a bunch I got from a member of a former church. Hopefully these will do the trick. 


All in all, I'm very satisfied. Here's the finished sail.


Pretty. Ain't it?

Wednesday, November 2, 2022

Time to Sew

Finally getting to the mainsail. I ordered the sails way back at the start of the project even though I knew it would be a long time getting to them. Well, that time has come.

Of course, I ordered a finished mizzen. It was virtually the same price as the kit. No brainer! I ordered a kit from Sailrite for the main. I built the sail for my SD11 but this one is 2-1/3 times bigger! The prudent plan was to use the church fellowship hall. So away I went.

Here are the panels all laid out. It is one big sail!


There are lots of tables in the hall which was one reason to use it. You have to get the sail up off the floor. Here are four tables set up together. This was especially good for rolling up the sail.

There was some prep work to be done, especially with the sewing machine. We had to check the needle size. I actually used my phone to check the size. I couldn't read numbers on the needles but with an enlarged picture I could! The directions, which I was sure to read thoroughly, called for a size 16 needle. We also had to load up a couple bobbins (we had to keep doing that too!) and thread the machine. The spool of thread is too big to sit on top of the machine and is meant to feed thread vertically anyway, so we had to rig a coat hanger in a pitcher for that.


The first order of business was sewing panels together in 2's. Here I am sewing two together. You have to roll them together to get them easily through the machine. Notice the thread setup. 


Here's my trustee "assistant" (actually I'm the assistant) seamstress taking a phone break. She was great! She did the hard work of sewing patches on the sail. I'll have to say, after sewing them on, there is no more wrinkle-free material. They were tough. 


Here is my method of keeping the rolls intact. Masking tape worked pretty well. 


Here is the sail with all panels and most patches complete. As you can see, I only requested two reef points. The sail plan actually gives two options with three reefs the recommened option. I may be sorry. Most builders are adding three points. In all my sailing I have only reefed once. This boat will require reefing more often because it carries a lot of canvas for its size (it's designed to sail well in light air), but I think two will be sufficient. 


I still have to sew three sets of patches and the tape around the edges. Then there will be grommets to install. The kit came with leather for the corners. Not sure if that'll be necessary. We'll see. 

Combined we spent a total of 17 hours on the sail yesterday.