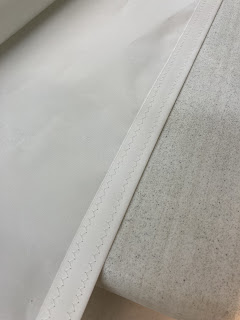
I sewed the remaining three sets of patches, one on the tack and two reef patches on the luff. Then I sewed the "tape" around the entire outer edge of the sail - approximately 45'.
The key to sewing a sail seems to be to get it up off the floor so that there is no drag on the material caused by it hanging over a small work surface.
Dacron is very slippery and will try to slide off the tables quickly. At one point in the sewing I was using eleven 6' tables. On day two, I actually set tables on top of tables to get my work plane on the same plane as the sewing machine. And because my sail was about 14-15' long, I had them lined up three on each side of the sewing machine (the one pic shows 2 but I added another at each end before I finished).
Sewing the panels together as well as the "tape" around the outer edge was actually the easiest part. You simply roll up the sail leaving the part to be sewed visible.
As seen above, I used masking tape to keep the sail rolled up while I sewed.
As you are building your sail, you stick the parts together as you go with double sided tape. They call it "Seamstik". You sew two panels together, then two more til they're all paired, add the interior parts as you go (the ones that don't fall on seams), and finally sew the pairs together into one big sail. Then you finish the patches that fall on the seams. The "tape" around the outer edge is last. Then, of course, there are the grommets to add.
My wife did help. She spent about 7 hours with me to start. She did most of the patch work. I taped; she sewed.
The sewing job is not perfect. Most of it is respectable, I guess. But apart from up-close examination, it will be fine. Most of the job went fairly smoothly though there were a few jams, rat's nests, etc. Our machine did a fine job. Chugged a little but there were times it was sewing through 8 layers of fabric!
Here's one of the grommets along with the grommets on the head of the sail which will be laced to the yard. I used 1/2" on the corners and 3/8" everywhere else. The grommets I had on hand were not the spurred ones. Kinda wish I had used them. Didn't think about it when I ordered because I knew I had a bunch I got from a member of a former church. Hopefully these will do the trick.


.PNG)

No comments:
Post a Comment